When it comes to recording training content, I used to just wing it. I’d make the slides from the ideas in my head and when recording I would just say what I thought to say. This ended in a lot of editing, re-recording, more editing, and some disappointments. Over the last decade I’ve learned from others and refined my approach. This is a brief description of what I do today.
Outline and Slides
I start by defining the course outline down to the clip level. This include the clips intention, lesson(s) taught, and estimated length in the course outline. I don’t do any scripting here but I do add notes that I think might be helpful later.
Next, I create the slides for each module using the clip descriptions in the course outline as the guide. By this time I usually have a pretty good idea of the what so it is more a matter of how. This is often the hardest part as I will come up with a pattern to convey an idea that I will reuse throughout the module/course. When I inevitably want to change that pattern, I need to apply the change across a lot of slides. Because of this I try to focus on a single module at first. When I am done with it and the patterns are defined, I can now work on the rest of the modules more easily.
I prefer to use slide transitions, not animations, to create flow and movement. Animations are great and a little more powerful than transitions, but they make creating print-ready slides more difficult since you have to rethink how to convey an idea without the animation.
Scripting and Audio
Once I have the slides complete, I begin to write the script for the module going clip by clip. This usually means I am iterating between the script and slides to improve both until I’m happy. It is usually here that I discover how I need to change patterns in the slides (described above).
I watch my word count and think about how many words per minute I speak so that I can confirm my clip lengths are aligned with my estimates in the outline. If they aren’t, I need to decide what to do. Maybe this needs to be two clips, or maybe two clips should be one. Maybe I need to remove details or perhaps I have a little room to go deeper. The most common outcome is that one clip will be a little short and I’ll steal that time for a clip that went a little long.
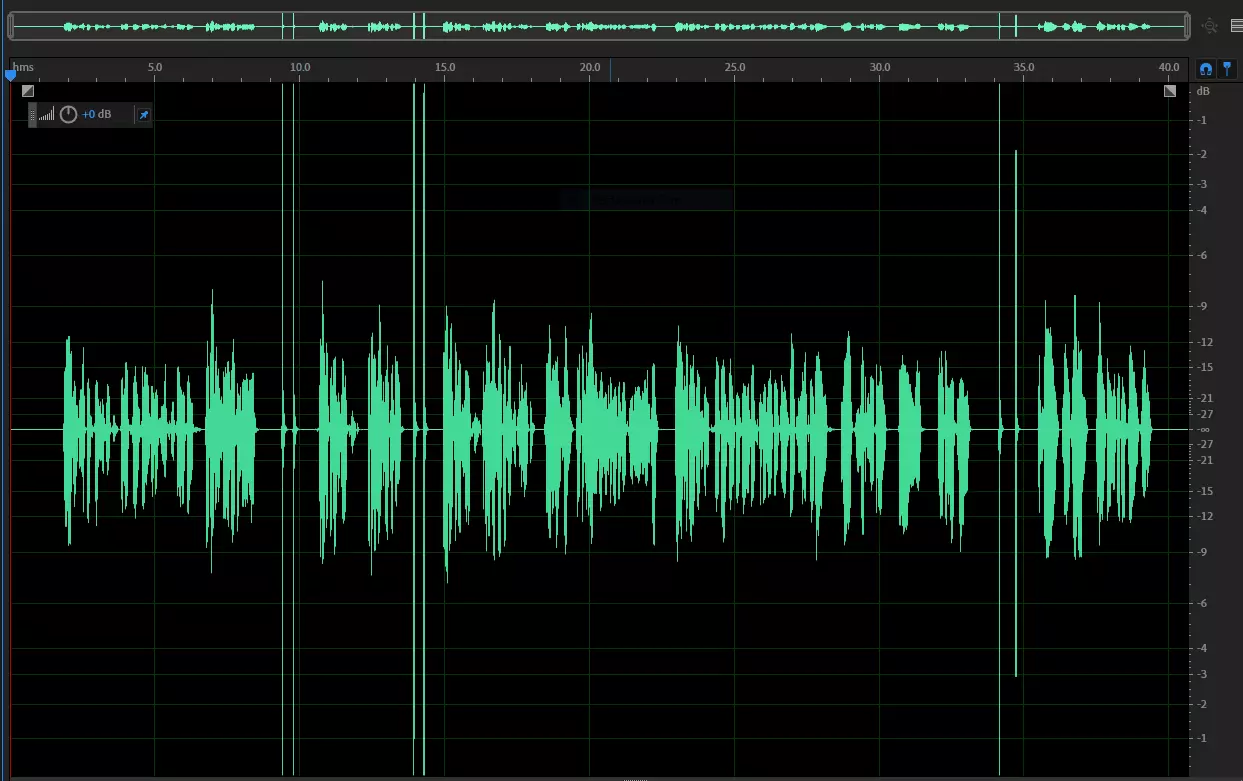
Next, I record and edit the audio. I record clip-by-clip, snapping my fingers near the mic anytime I make a mistake or want to try something two ways. This makes my waveform really easy to navigate since snaps are visually obvious which allows me to jump between edit points very quickly.
 .
.
I also make sure that anytime I need to make an edit, I don’t try and do it mid-sentence. I repeat at least the whole sentence, and often the whole paragraph. A lot of my mistakes are not the wrong words but the wrong tone or inflection. If I don’t re-record the whole paragraph it can often be obvious a new ending was punched in as inflection isn’t just on a single phrase or word - there is a lead-in to it that I can hear.
At this point I have my audio completely edited.
Recording Slides
I record the slides by playing the audio for the clip and moving through the slides in sync (as close as possible) to the audio. My Camtasia recording will capture both the screen showing the slides and also the audio via the system audio input. You can’t play the audio in Camtasia while recording so you will need to play it in an external tool.
When this is done I have 2 tracks - the slides+system audio and the production audio.
Now I split the slides+system audio into two tracks. Then I slide the production audio to align with the recorded system audio. This will never be perfect but I get it to the point that it sounds like only a single voice is speaking but there’s a weird stereo effect. I will then trim the video recording to align with the start of the audio (there is always a few seconds of me clicking things, starting the slides, etc - but I don’t have the system audio playing until the slides are running correctly).
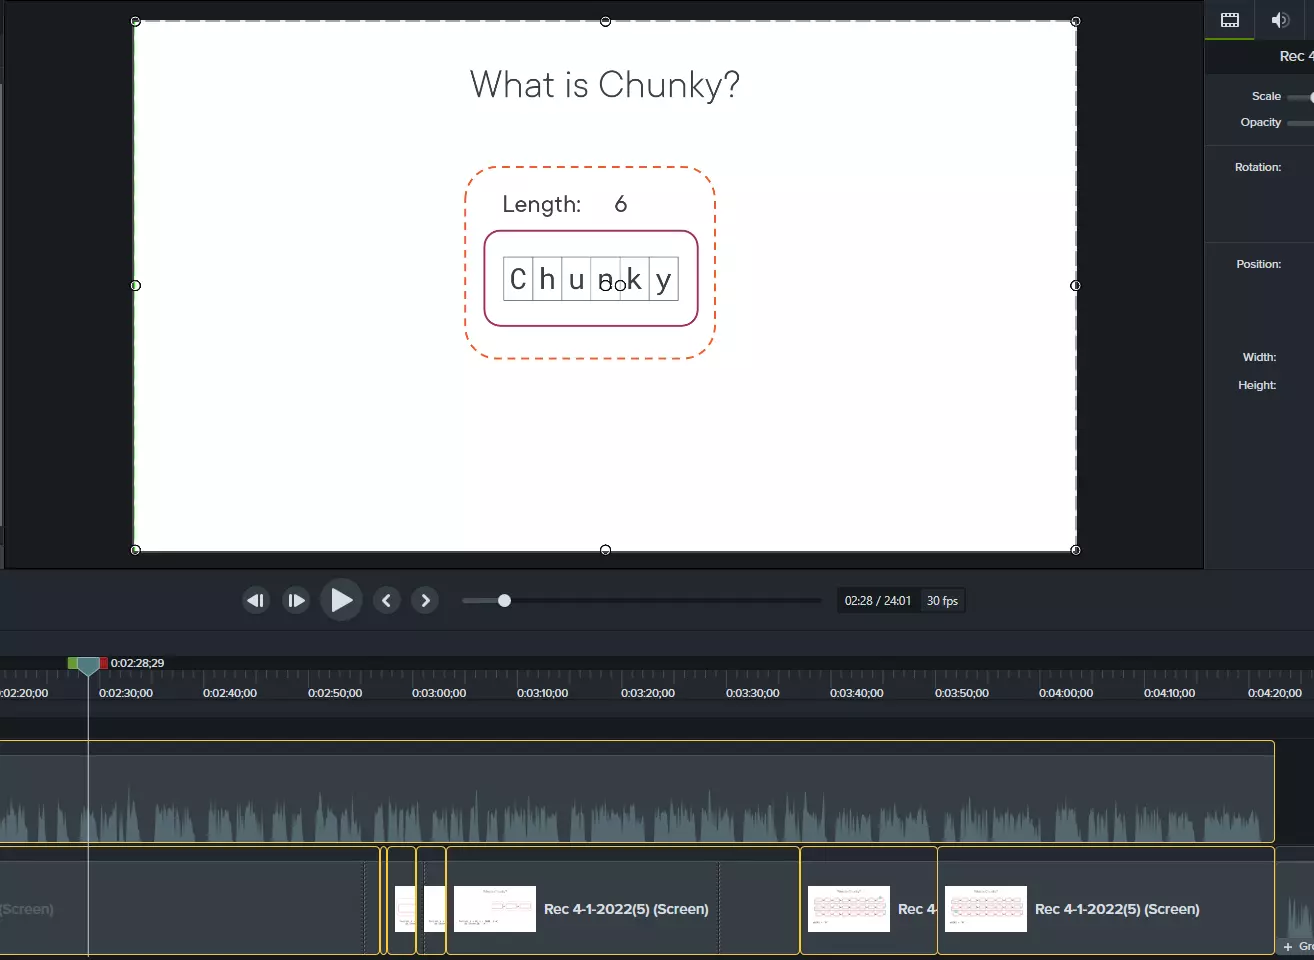
With those align I will delete the recorded system audio and can now edit the slide recording and production audio together. Since I recorded the slides against this audio, there is usually only minor editing to do and it’s almost always a timing issue.
When I’m happy, I group all the edits into a single group and then render that group.
Recording Demos
I record demos on a virtual machine (Hyper-V). This is really important to me because (a) I want to lock the version of Windows and Visual Studio that I am using and (b) I want to be able to use that virtual machine, in that exact state, if I ever need to make updates to the course. Having to do an edit a year later requires getting everything setup exactly as before - this makes it so much easier. I don’t worry about the VM for the slides.
For demos, I invert the order that I record the audio and video. I get my demo code prepared and think about the major momoents in the demo (changing files, scrolling, editing text, running the program, etc).
Demos showing source code require a large font. Check ahead of time what your maximum line length will be in your rendered code (do this in your production sample) and stick to that max line length as much as possible.
When recording the demos I don’t worry about the audio timing at all - what will be a 4 minute demo clip might only be 30 seconds of recorded time. I do focus on:
- Cursor and mouse location. This is critical - you don’t want a cursor just hanging out in the middle of our editor.
- Scrolling. I use the arrow keys and try to click 2 lines per second - during editing I will adjust clip speed to be 5x when scrolling.
- Getting the relevant code centered
- Inputting new text
- Pausing between major moments (scrolling, typing, etc) so that I can use that as an edit point
For text input I use AutoHotKey macros. For example, here is a macro that enters some content with a key delay that feels like a fast, but natural, typing speed.
SetKeyDelay,22,,,

!1::
SendRaw, txt_Contents.Text = txt_Contents.Text.Replace(before, after);
return
When possible, minimize anything that identifies the specific version of your OS or text editor. They can make a course seem dated even if the content is relevant.
With the video recorded, I now use the outline and video to create the script. Sometimes this means I need to go back and re-record something but this usually works. I’ve found it’s easier to record the video than the audio so I bias towards that. When the script is ready I record it using the process I described above.
Next I go through the demo and I cut the video at the major points (see bullet above). I then align those major moments to the appropriate audio and apply the 5x clip speed to any scrolling moments. This leaves me with the audio-aligned-moments and a bunch of gaps that need to be filled. I fill them by extending a single frame over that time (Camtasia and Premiere can do this). It takes some tweaking to make things seem natural. You don’t want a mouse cursor appearing out of nowhere (at least obviously), and transitions (changing source file, etc) need to be considered. But eventually you end up with a demo that feels like you were talking while typing and you are just somehow really good at scrolling.
As before, I now group all the fragments into a clip and I render the clip.
Other Random Advice
My other advice is:
- Create and submit your easiest module first regardless of module order. Get a quick win under your belt.
- Avoid applying any updates (especially major versions) to your tooling during the recording process.
- If you are using Camtasia, save early and save often. It crashes a lot. The latest version really has trouble with rendering between markers. And if you’re using Camtasia on a Mac, it is missing some features Windows has (like batch rendering).
- Don’t forget that the Overview/Summary slide has both words - Overview and Summary - on it. You need to delete the appropriate word depending on the context. I forget every time.