This began yesterday morning when I started reading Understanding the 4 Rules of Simple Design by Corey Haines. On page 9 there is the suggestion to stop and write out your own implementation of Conway’s Game of Life so I paused and did that.
If you just want to see the final output - you can try it here or view the source
My Objective
I have done very little UI-focused work. My only experience with Javascript is working on Node (and that was limited). I have never worked with jQuery. I know next to nothing about CSS. So I thought I’d start working in that realm.
My goals were:
- Implement a solution that renders in a web browser
- Retain minimimal state
- Use HTML, Javascript and jQuery - nothing else
- Under 200 lines of code (it’s exactly 200 including comments)
- Have something working in under 2 hours
I ultimately met each but backed away from retaining minimal state as part of improving performance.
My Thought Process
I believed the following were true:
- I could draw a grid dynamically using javascript and CSS
- I could use some state of the cell to track if it was alive or not
- I could access the grid in a (row,column) fashion to check neighbor state
- There must be some mechanism to run events (steps) on a timer
- I could improve performance as needed (it was needed)
I didn’t know how to do those things so let’s get to it.
The Globals
Heck yeah I used globals. I didn’t know I’d use these all upfront but it’s easier to show them up front since they are sprinkled through the remainder of the code samples.
var initialFillPercent = 0.25;
var fps = 10;
var size = 100

var running = false;   // toggled by the start/pause button
var intervalId = null; // set and cleared by start/pause
var stepCount = 0;     // just used to display the step

// the cells will be in an array where the cell at (row = r, column = c)
// can be found at items[r * size + c]
var items = [];
var toKill = [];
var toBirth = [];
They will be explained below.
Drawing the Grid
My goal here was to figure out how to draw a grid that would fit into the viewable portion of the browser window and resize dynamically.
Where I started was just making a 3x3 of divs like:
<div id="board">
  <div class="row">
      <div class="cell"></div>
      <div class="cell"></div>
      <div class="cell"></div>
  </div>
  <div class="row">
      <div class="cell"></div>
      <div class="cell"></div>
      <div class="cell"></div>
  </div>
  <div class="row">
      <div class="cell"></div>
      <div class="cell"></div>
      <div class="cell"></div>
  </div>
</div>
Then I played around with it.
I’m going to skip over a lot of steps and show you where I ended up. There are three pieces to it.
Grid HTML
I added a wrapper so that I could use it to constrain the overall size of the grid to ensure it stayed within the visible space of the browser window. The animation isn’t fun to look at if you can only see half of it.
I also added a button that can be clicked to start/pause/continue the game and a span that simple displays the step count. These aren’t part of the grid but they are part of the overall UI.
  <div id="wrapper">
    <div>
      <button id="toggle">Start</button>
      <span id="step"></span>
    </div>

    <div id="board">

    </div>
  </div>
Grid CSS
The wrapper uses a width and height of 95vmin (95% of viewport minimum) to ensure that the entire grid will be visible (leaving room for button/step prompt). I learned this technique from a StackOverflow post.
There is one bit of styling (grid-template-columns) which will be set dynamically but I’ve shown it here so that it makes sense. The 100 is because there will be 100 columns per row and each cell will be 1fr (fractional unit) in width. It is the size (100) that is set dynamically based on the size of the grid.
The board’s display mode is grid.
The cells are 1fr in size (see the note about grid-template-columns) and have some coloring applied and the cell:after is used to ensure they are squares. I learned this trick from Bobby Kilpatrick’s post How to Create a Responsive Square with CSS. And I decided that when cells are “live” they would have the .live class and be dark red. Overall, pretty straight forward
#wrapper {
  width: 95vmin;
  height: 95vim;
  margin: auto;
}

  #board {
    display: grid;
    grid-template-columns: repeat(100, 1fr); /* added dynamically */
}

.cell {
    background-color: rgba(255, 255, 255, 0.8);
    border: 1px solid;
    width: 1fr;
}

.cell:after {
  content:  "";
  display:  block;
  padding-bottom: 100%;
}

.cell.live {
  background-color: darkred;
}
Generating the Table (Javascript)
This is my fourth iteration of this approach.
First I had a structure like this.
<div id="board">
  <div class="row" id='r-1'>
      <div class="cell" id='c-1'></div>
      <div class="cell" id='c-2'></div>
      <div class="cell" id='c-3'></div>
  </div>
  <div class="row" id='r-2'>
      <div class="cell" id='c-1'></div>
      <div class="cell" id='c-2'></div>
      <div class="cell" id='c-3'></div>
  </div>
  ...
</div>
I would use multiple jQuery selectors to first find the row div and then I would find it’s child.
Then I simplified to this:
<div id="board">
  <div class="row" id='r-1'>
      <div class="cell" id='r-1c-1'></div>
      <div class="cell" id='r-1c-2'></div>
      <div class="cell" id='r-1c-3'></div>
  </div>
  <div class="row" id='r-2'>
      <div class="cell" id='r-2c-1'></div>
      <div class="cell" id='r-2c-2'></div>
      <div class="cell" id='r-2c-3'></div>
  </div>
  ...
</div>
With this approach I could jump straight to the specific cell I needed by ID.
Then I went to this:
<div id="board">
    <div class="cell" id='r-1c-1'></div>
    <div class="cell" id='r-1c-2'></div>
    <div class="cell" id='r-1c-3'></div>
    <div class="cell" id='r-2c-1'></div>
    <div class="cell" id='r-2c-2'></div>
    <div class="cell" id='r-2c-3'></div>
  ...
</div>
And this was good but still relied on using jQuery selectors. This was part of me trying to retain minimal state but it came at the cost of performance. When I profiled it running for a few seconds it spent almost all of it’s time in hasClass - so I figured it was worth replacing that with something a little more primitive.
Ultimately I created an array of cells named items (see below) which I populated when I created the cells. The first cell (row 0, column 0) was in index 0, the last (e.g., row 100, column 100) was the last index. And any cell could be found like:
var cell = items[row * size + column];
A few notes:
- the variable
sizeis the number of rows/columns (it’s a square so 100 would be 100x100). - markDead (shown below) marks each new cell as dead. Since I need to show markDead, I also have markAlive, and isAlive shown below. The
liveclass is still used for formatting.
$(document).ready(function () {
  createEmptyGrid();
});

function createEmptyGrid() {
  for(var i = 0; i < size * size; i++) {
    var $cell = $("<div />", { class: 'cell'});
    items.push($cell);
    markDead($cell);
    $("#board").append($cell);
  }

    // sets the css to ensure make our grid a square
    $("#board").css("grid-template-columns", "repeat(" + size + ", 1fr)");
}

function isAlive($cell) {
  return $cell.alive == 1;
}

function markAlive($cell) {
  $cell.addClass('live');
  $cell.alive = 1;
}

function markDead($cell) {
  $cell.removeClass('live');
  $cell.alive = 0;
}
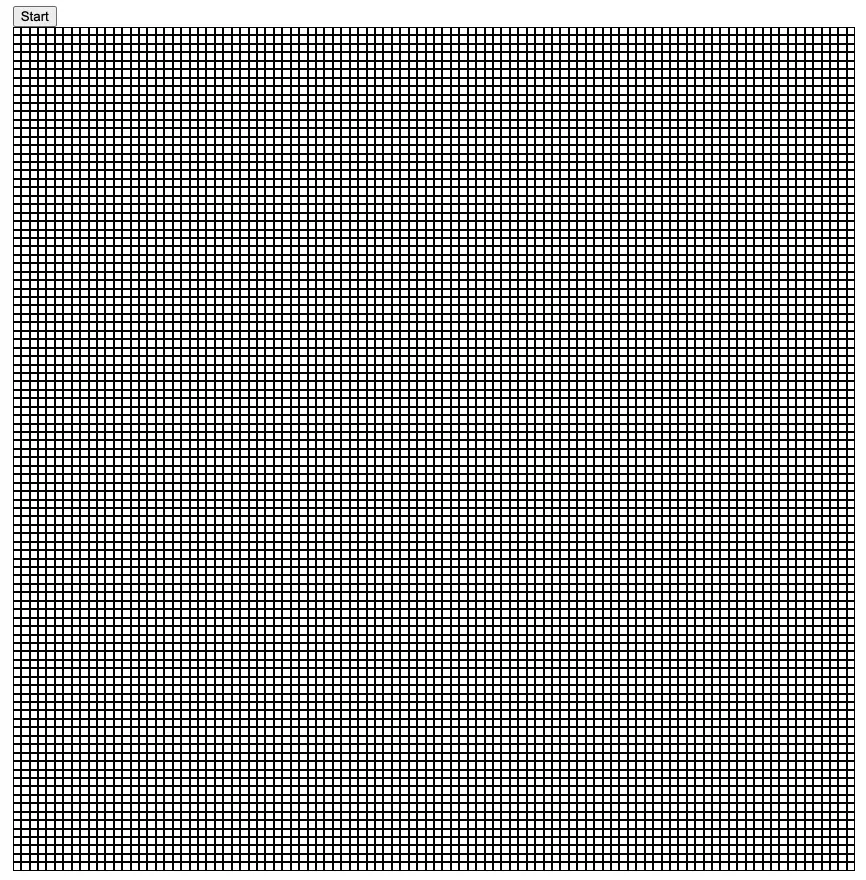
With that done - we know have a 100x100 grid (the size can be changed via the size variable) which looks like this:
The Game Loop
With the board working it was time to build the game.
Step 1: Initial Population
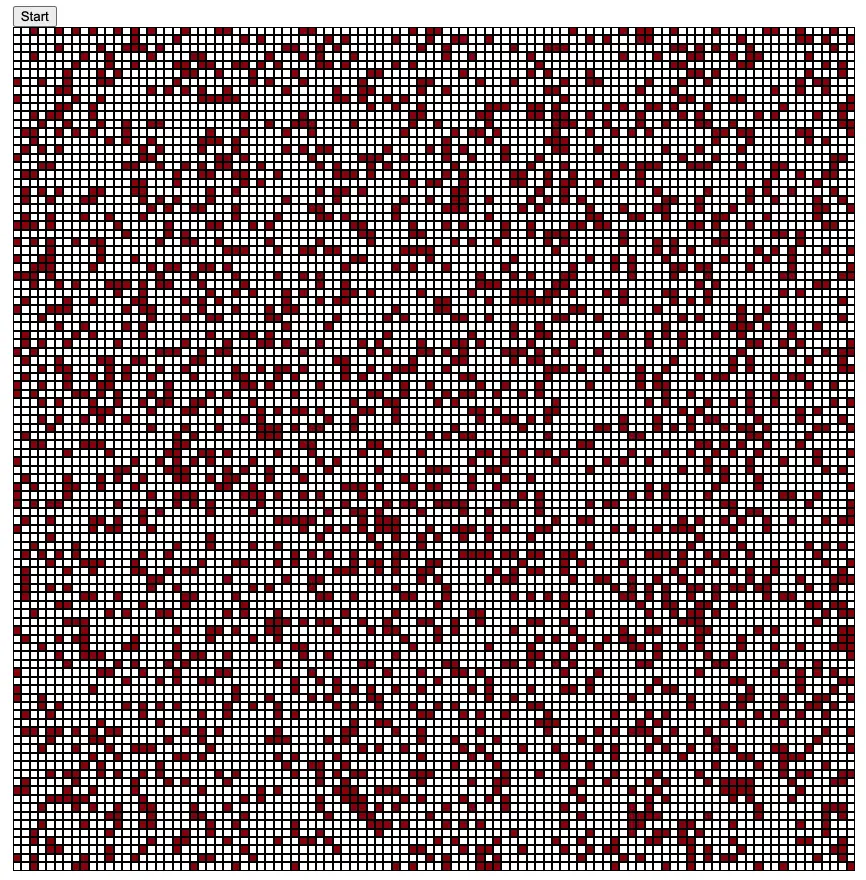
To populate the board I determine the initial fill percentage (e.g., 25% of the cells should be marked alive) and then for each cell that should be alive I pick a random cell and mark it as alive (set the ‘live’ class and set the alive property to 1).
function populateRandom() {
  for(var i = 0; i < (size * size) * initialFillPercent; i++) {
    markAlive(randomCell());
  }
}

function randomInt(max) {
  return Math.floor(Math.random() * max);
}

function cellAt(row, column) {
  return items[row * size + column];
}

function randomCell() {
  return cellAt(randomInt(size), randomInt(size));
}
This method is called from the document.ready callback and gives us an initial board like this:
Step 2: Starting the Game (Clicking Start)
To get this finally going I needed to add a button handler to the document.ready method so that when the Start button is clicked the game starts. It now looks like:
$(document).ready(function () {

  createEmptyGrid();

  populateRandom();

  $("#toggle").click(function() {
    if(!running) {
      start();
    } else {
      pause();
    }
  });
});
The button toggles between “Start”, “Pause”, and “Continue” depending on the running state. The start and pause functions are:
function start() {
  intervalId = setInterval(function() { step(); }, 1000 / fps);
  running = true;
  $("#toggle").html("Pause");
}

function pause() {
  clearInterval(intervalId);
  running = false;
  $("#toggle").html("Continue");
}
Start creates an interval that runs on a timer (1000 ms / fps = how often to run), sets running to true, and changes the prompt on the button from “Start” to “Pause”.
Pause clears the interval, sets running to false, and changes the button text to “Continue”.
Step 3: Running a Step
The step function is called everytime the interval fires - so let’s look there next:
function step() {
  applyRules();

  processChanges();

  $("#step").html(stepCount++);
}
Step is a two-step process and it needs to be this way to function correctly.
The rules of Conway’s Game of Life require the current cell to live, die, or birth based on the state of neighboring cells so to run you first need to look at each cell and decide if it’s state will change and only once those decisions are made do you apply the changes. If you applied them while looking a the cell, then that change would affect any future cell you checked.
Step 4: Applying the Rules
The rules are pretty simple - look at every cell, figure out how many living neighbors it has, and then decide what to do. The cell is alive 2 or 3 living neighbors, it lives (otherwise it dies). If a cell is dead and has exactly 3 neighbors, it will come to life.
This loop does that. For every row (rows are just a logical concept that make cellAt easier to implement), and for every column in that row:
- Get the current cell
- Count it’s living neighbors
- Apply Conway’s rules
- If the cell will be kill, push it onto the kill queue
- If the cell should be birthed, push it onto the birth queue
In a previous iteration of this I used CSS classes to track whether to kill or birth. I have class=toggle-kill and class=toggle-live. Then I’d do:
$('.toggle-kill').removeClass('live');
$('.toggle-kill').removeClass('toggle-kill');
$('.toggle-live').addClass('live');
$('.toggle-live').removeClass('toggle-live');
And this worked but it was pretty slow. It was limited to about 6FPS at 128x128. I moved instead to kill and birth queues (cell arrays).
function applyRules() {
  // We need to figure out what cells live, die, or are born
  // but we don't want to change their state during this loop
  // as that will impact their neighbors
  // Add the cell to an array of items to birth and kill
  // and process them after this (processChanges)
  for(var r = 0; r < size; r++) {
    for(var c = 0; c < size; c++) {
      var $cell = cellAt(r, c);
      var neighbors = livingNeighbors(r, c);

      if(isAlive($cell)) {
        if(neighbors < 2 || neighbors > 3) {
          toKill.push($cell);
        }
      } else {
        if(neighbors == 3) {
          toBirth.push($cell);
        }
      }
    }
  }
}
cellAt does the calculation into the items array to find the cell by row and column, and livingNeighbors simply looks at each adjacent cell and checks if it is alive or not and returns the sum of living cells.
function cellAt(row, column) {
  return items[row * size + column];
}

function livingNeighbors(row, column) {
  var count = 0;

  for(var r = row-1; r <= row+1; r++) {
    for(var c = column - 1; c <= column+1; c++) {

      // skip self
      if(r == row && c == column) continue;

      // stay inbounds
      if(r < 0 || c < 0 || r >= size || c >= size) continue;

      var $cell = cellAt(r, c);

      if(isAlive($cell)) count++;
    }
  }

  return count;
}
Step 5: Process Changes
Now that we’ve queued up the kill and birth queues, we just need to process them.
function processChanges() {

  toBirth.forEach(function($cell) { markAlive($cell); });
  toKill.forEach(function($cell) { markDead($cell); });

  toKill = [];
  toBirth = [];
}
Mark them all appropriately and empty the arrays.
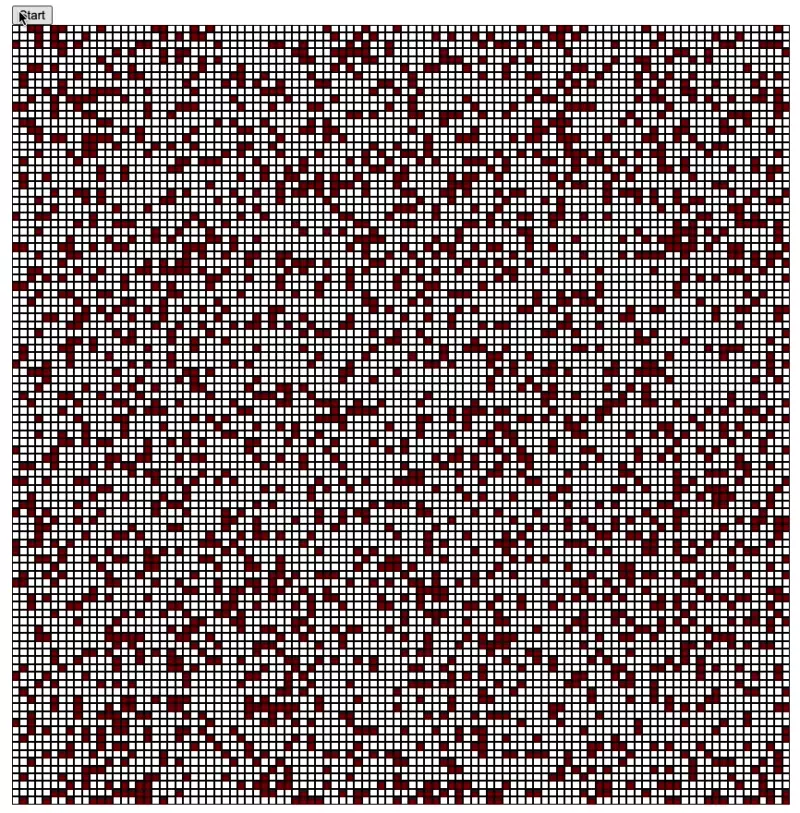
Now you just need to load the page, click start, and watch the show.
The Show
And you can try it for yourself here.